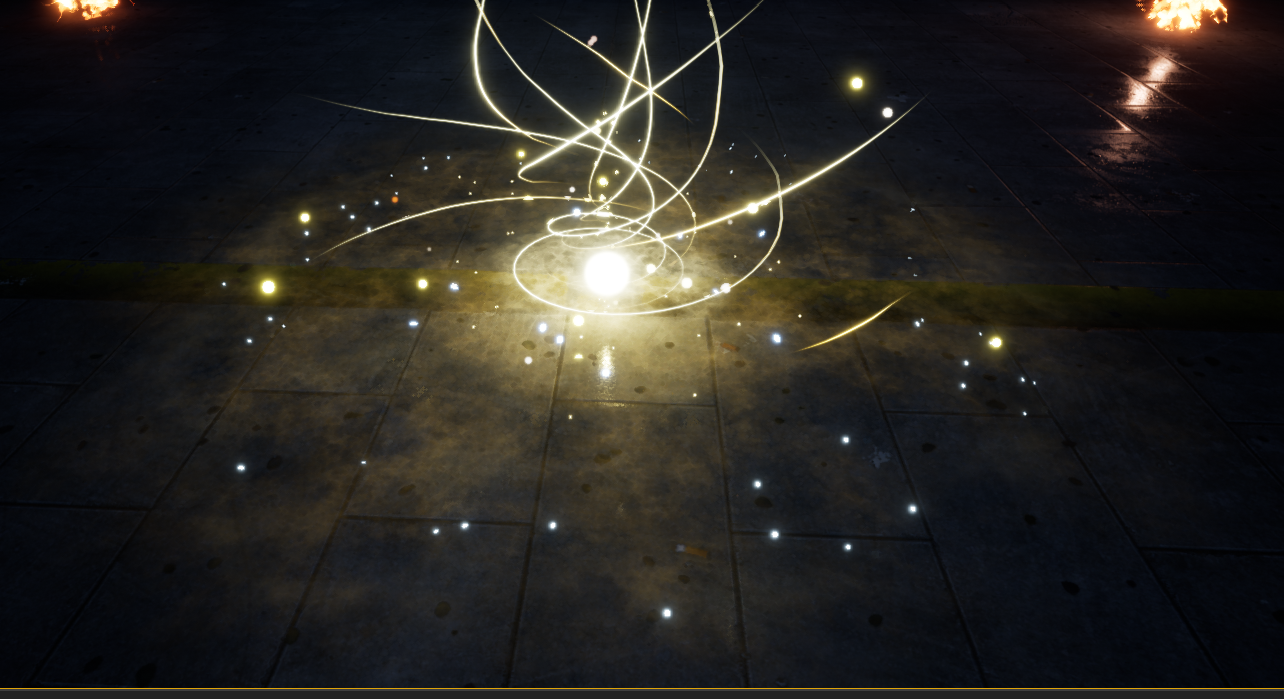
This week I am looking at how to create dynamic textures for my game visual effects (VFX). Although the game engine provides several ways of animating the sprites of static textures, it still feels lack of details of movement of individual sprite and the whole VFX looks very mechanical.
I did some research on different methods of how to animate textures that are suitable for integrating with Unreal Engine, here are what I found:
Method 1:
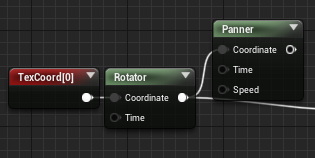
For simple movement, such as pan the texture or rotate it, it can be easily done within the material editor in Unreal, with a Panner node or Rotator node.
See Figure 1.
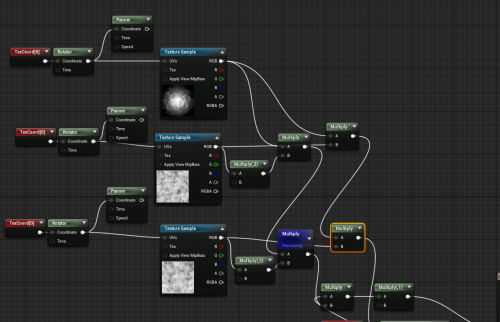
These two nodes together with the TexCoord node can be used to create some fair complicated random movement textures by changing the tiling of the texture, speed and directions of pan or rotation, then combine these a series of multiplication calculation of texture UV data. The typical formula is {[(tex01 * text02 *2) * tex03 *2] * infinite…} for both Base Color and Opacity channel, showing as below in material editor:
See Figure 2.
The above graph, using only 2 textures (one with slightly different size (by tiling it)), resulting something like this (Click to watch on Youtube), which is fairly complicated.
So, the advantage of this method is that it is SUPER cheap and quick - few texture samples and some multiplications, which is nothing for modern CPU. The disadvantage is that it may lack some of the customized control over movement, and it cannot simulate realistic movement such as smoke, but only something looks similar. But since the art style of my game VFX is not highly rely on physical simulation so I think this method is viable for me.
Method 2 – Flipbook/SubUV
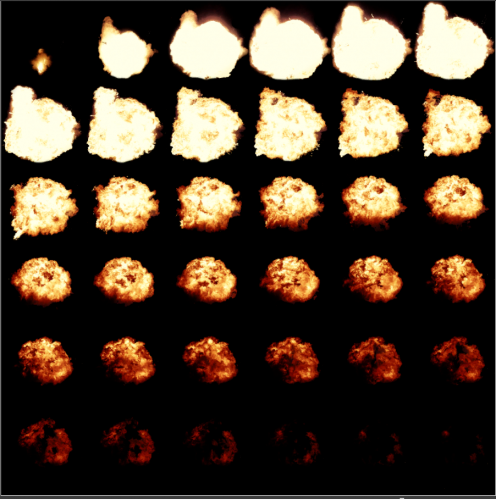
Flipbook is a common method used to make animated sprites in games. A flipbook is a sequence of textures that placed in a N x N grid in a single texture. Each texture represents a key frame of the animation, so when the game engine reads the whole sequence the sprite looks like playing an animation.
Example of a Flipbook: see Figure 3.
This kind of sequence of images can be generated from frame-by-frame hand drawing in photoshop, or using simulation in engines like After Effects, 3Dmax or Houdini then render and export as sequence. However. the process can be relatively long and complicated as it requires the usage of multiple other software.
Method 3 -Flow map
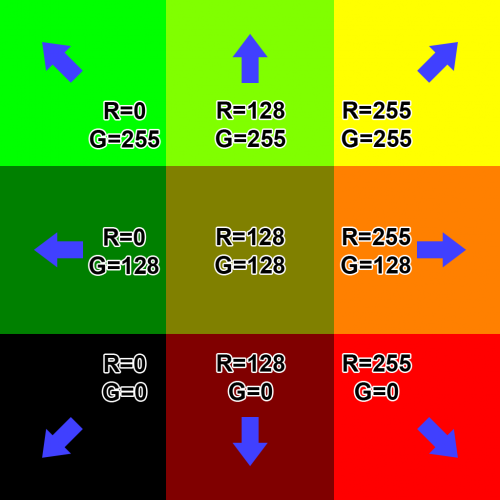
Flow map is a texture that use color values (R & G channel only) to store vector date, with red color (R 255, G 0) meaning the right-down vector (1, 0, 0) and yellow color (R 255, G 255) meaning the right-top vector, any other color in between pointing different directions depends on their value:
See Figure 4.
Flow map is a very good way to create customized and realistic fluid-like movement, such as river flows, steam etc. It is easy to create and set up in Unreal Engine. However, I am not seeing this quite useful for my project at this moment, so I will just stop it here.
Conclusion
As conclusion, after doing this research I think using the Flipbook method by first creating the animated image sequence in Photoshop and After Effects then export into Unreal’s particle system is probably the best way for me at this stage as I can have customized control of shape and movement of the texture and not to have a very physics-based looking of movement as my game has a fantasy style. So it’s time to learn some After Effects 😊
About This Work
By Bruce Hu
Email Bruce Hu
Published On: 28/09/2020

